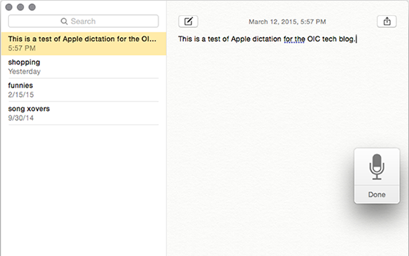
The next time you're going to type a lengthy (or short) bit of text, why not dictate instead. It's easy to learn how and it's really powerful.
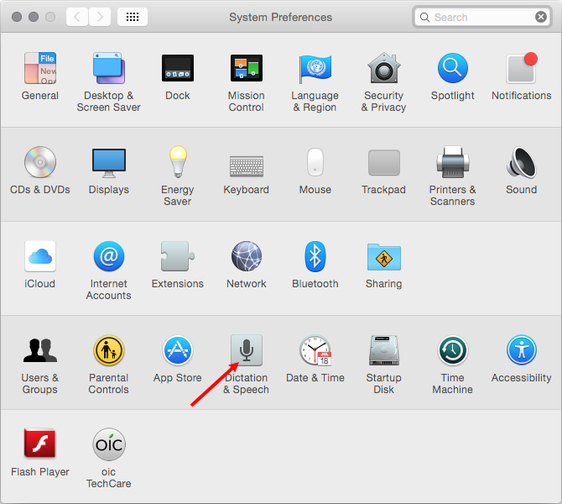
To enable dictation, go to system preferences under the Apple menu and click on Dictation & Speech.
Check dictation On and select Use Enhanced Dictation if available. You're ready to go.
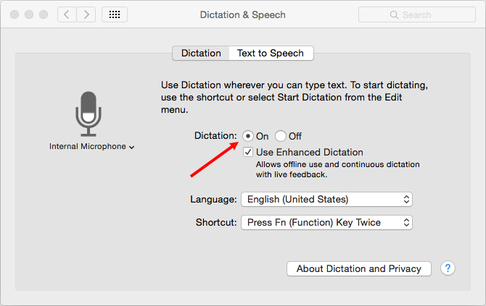
Yosemite provides an enhanced experience for offline mode.
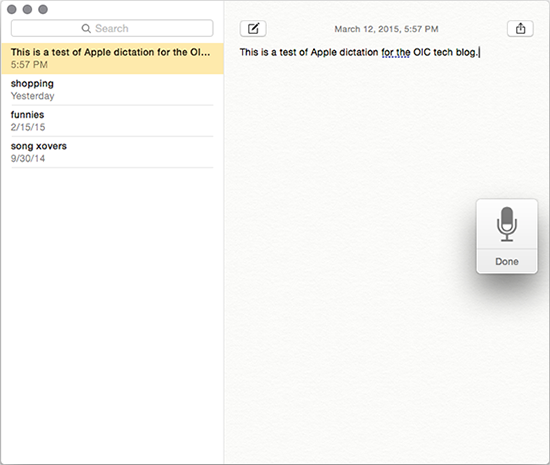
Now open your favorite place to type something. It could be a new note in Notes, a new email in Mail, or a text document in Pages or Word. Apple Dictation works with a wide variety of software. It's important that you have your insert point (|) ready where you want to dictate. Tap the fn (function) key twice and wait for the little popup microphone to prompt you that it is ready. Then, speak slowly and clearly and watch as the magic unfolds.
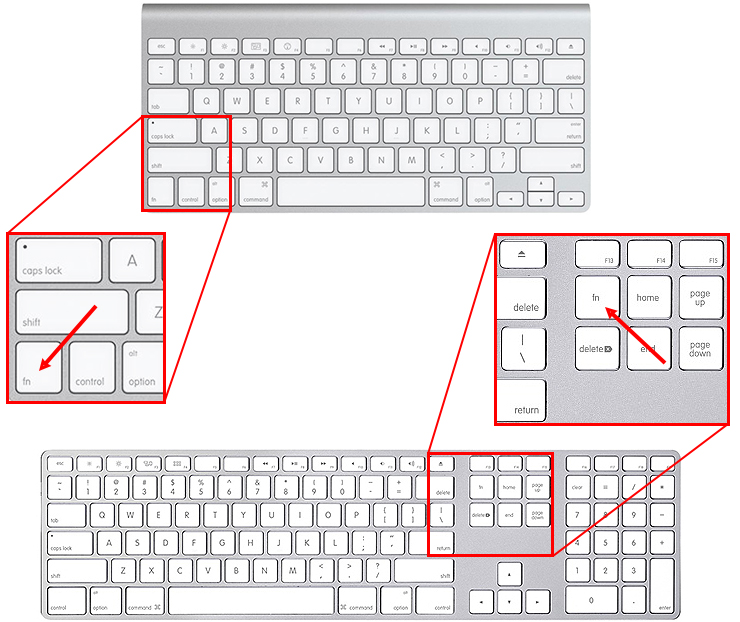
To stop dictation, and edit what you have dictated simply hit fn once or click Done.
Some common (and not so common) commands Apple Dictation understands:
|
Punctuation
apostrophe |
Result
‘ |
Typography
ampersand Emoticons
cross-eyed laughing face |
Result
& / Result
XD |
|
Capitalization
caps on |
Result
formats next phrase in Title Case |
Currency
dollar sign |
Result
$ |
|
Word and Line
new line |
Result
adds line break |
Mathematical
equals sign |
Result
= |
|
Intellectual Property
copyright sign registered sign trademark sign |
Result
© |
To see a list of additional commands in OS X Yosemite:
- From the Apple menu, choose System Preferences.
- Click the Accessibility icon in the System Preferences window.
- Click Dictation in the list of Accessibility options.
- Click Dictation Commands.
For even more commands, select the option to "Enable advanced commands."

